6.4.3. Extension Plugins
PyMoDAQ’s plugins allows to add functionnalities to PyMoDAQ from external packages. You should be well aware of the instrument type plugins and somehow of the PID models plugins. Here we are highlighting how to built dashboard extensions such as the DAQ Scan.
Note
The base classes of an extension, CustomExt and CustomApp, are explained in the previous section of the
developer’s guide, CustomApp and CustomExt, with diagrams of their structure, of their lifecycle and of the objects they
use. Read it first: this page only covers how to package an extension in a plugin.
An extension is a user interface that runs inside the Dashboard and uses the instruments (control modules) the
Dashboard already manages, for instance to scan an actuator while recording a detector, or to log their data. The base
class for such an interface is CustomExt: it is CustomApp (the generic user-interface skeleton also used by
standalone applications and by the Dashboard itself) plus what deals with instruments and the Dashboard. The big
picture, with diagrams, is in The big picture.
For your package to be considered as a PyMoDAQ’s dashboard extension, you should make sure of a few things:
The entrypoint in the pyproject.toml file should be correctly configured, see Fig. 6.15
The presence of an extensions module at the root of the package
each module within the extensions module will define an extension. It should contains three attributes:
EXTENSION_NAME: a string used to display the extension name in the dashboard extension menu
CLASS_NAME: a string giving the name of the extension class
a class deriving from the
CustomExtbase class (see CustomApp and CustomExt).CustomExtitself extendsCustomAppwith what deals with instruments and the Dashboard (dashboard,modules_manager, experiment and state managers, Dashboard toolbar), through theDashboardMixin(see DashboardMixin)
The pymodaq_plugins_template contains already all this, so make sure to start from there when you wish to build an extension.
check_plugin (see Instrument Plugins) also reads the modules of the extensions folder, without importing
them, and reports the codes PMQ330 to PMQ339: missing EXTENSION_NAME or CLASS_NAME, a class that does not derive
from CustomExt, deprecated imports and hooks, managers created by the extension instead of those of the Dashboard, an
__init__ that does not take (parent, dashboard) or never calls self.setup_ui(), a _quit_fun missing or
never returning True. _quit_fun is the guard of quit_fun: return False while something is left running
(threads, workers…) and True when everything is released, otherwise the extension is never closed. Do not override quit_fun itself: it calls the guard, then closes the
window and shows the Dashboard again.
To check an extension while you write it, without the rest of the package, or an extension of PyMoDAQ itself, use the
check_extension command on a file or a folder:
check_extension src/pymodaq_plugins_xxxx/extensions/my_extension.py
check_extension [--fail-on error|warning|todo] [--core] [--color auto|always|never] path [path ...]
Like check_plugin it returns 1 if there are findings of the --fail-on level, and it reads the sources without
importing them. The extensions of PyMoDAQ (pymodaq/extensions) are recognized from their path and need not define
EXTENSION_NAME and CLASS_NAME (PMQ330 is then not reported, --core forces it).
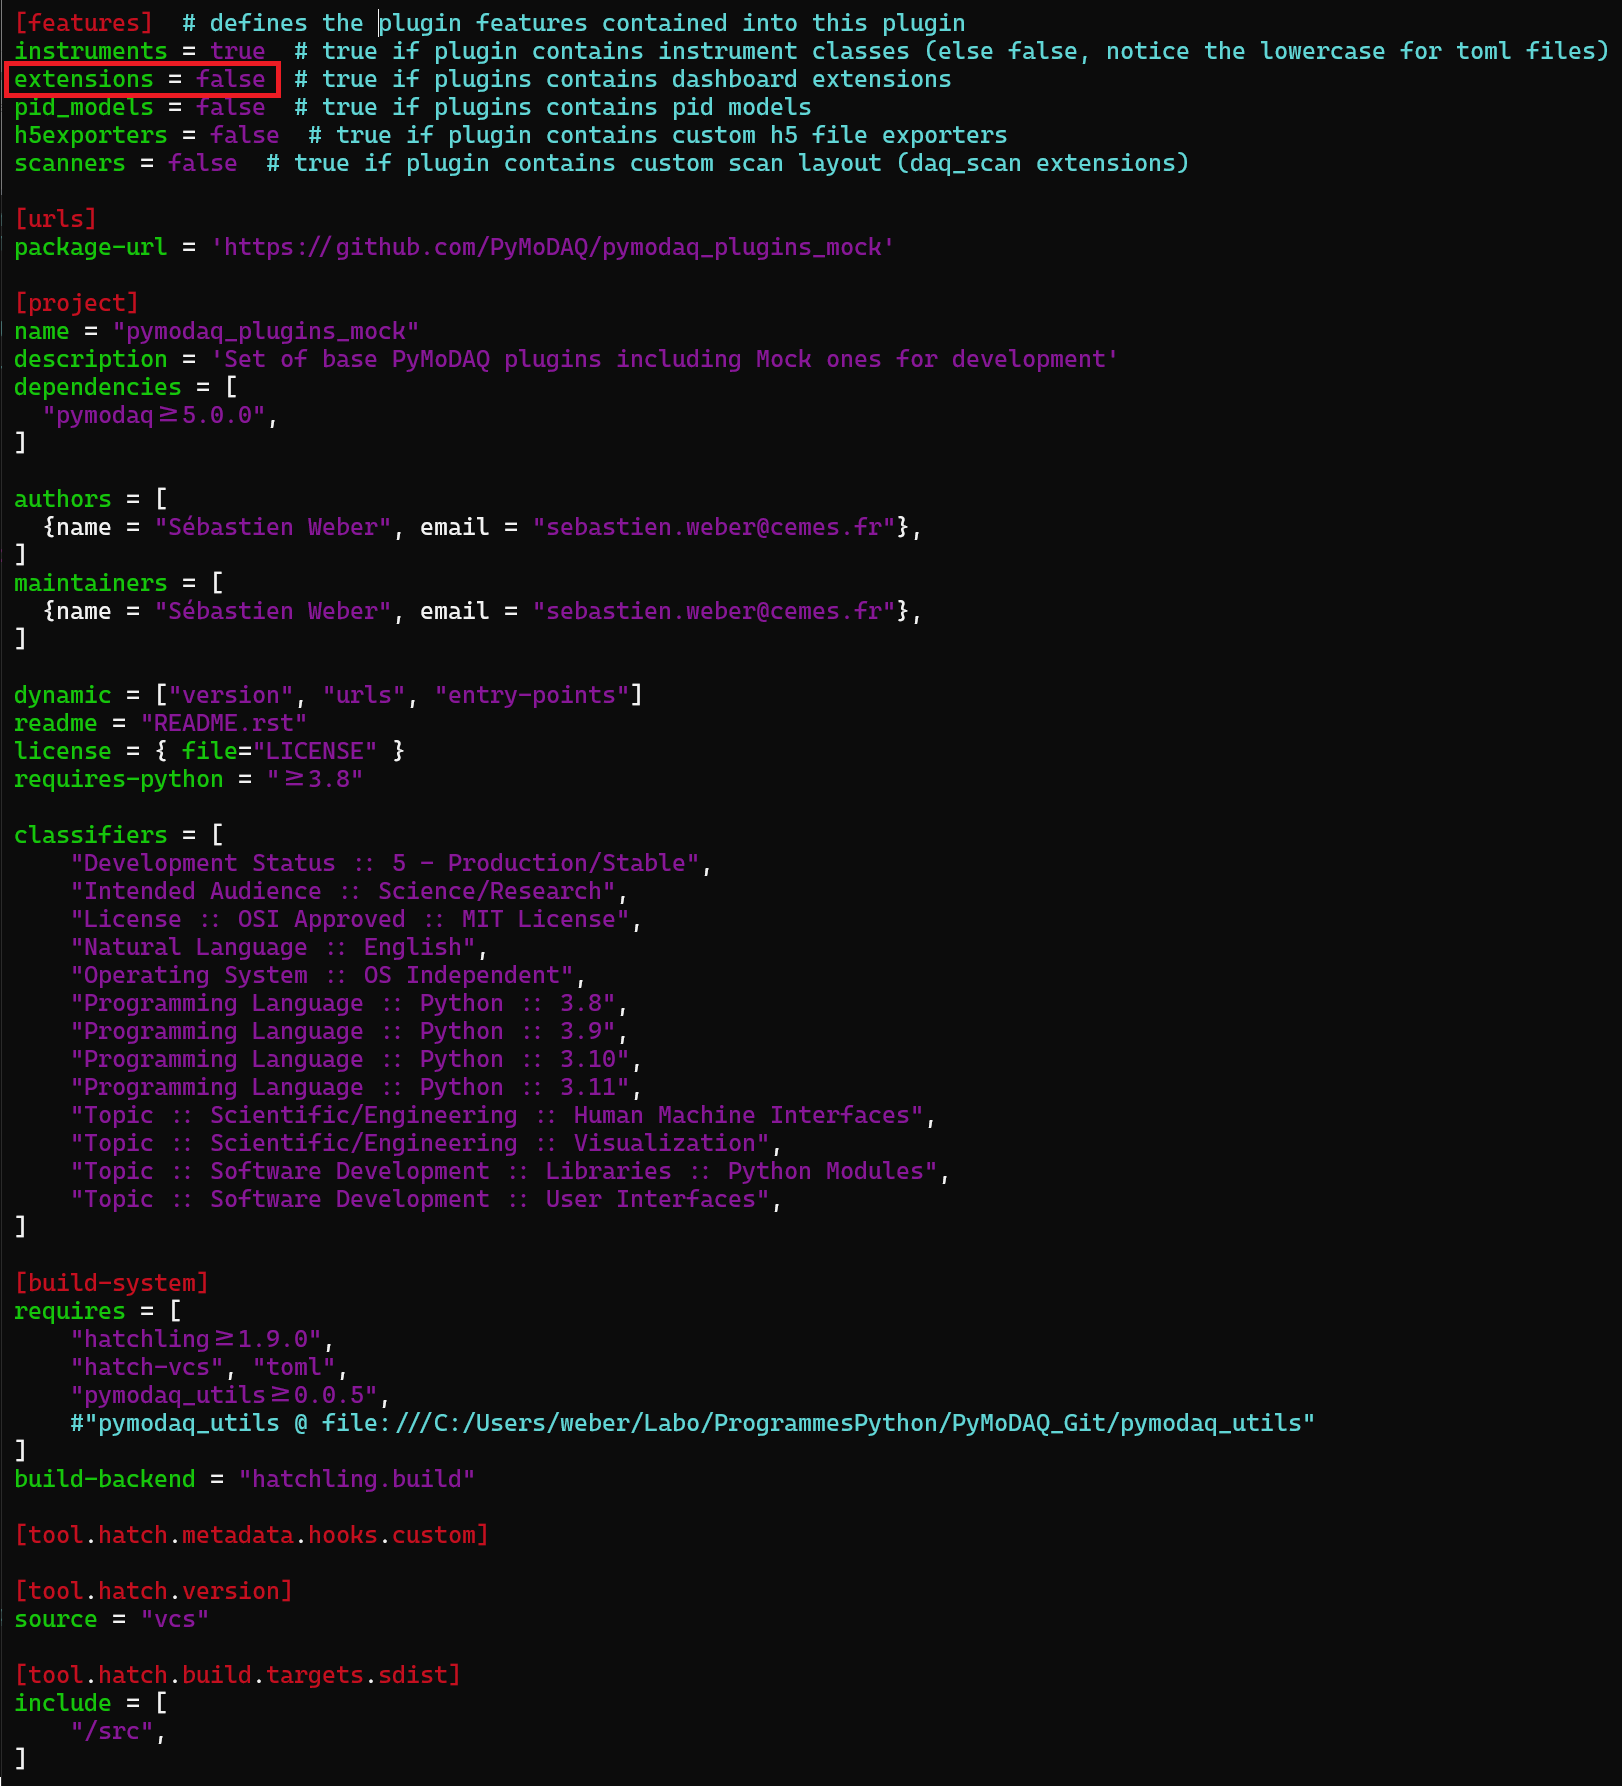
Fig. 6.15 The correct configuration of your package.
The class itself defining the extension derives from the CustomExt base class (pymodaq.utils.custom_ext), which
extends the CustomApp base class. As such, it’s __init__ method
takes two attributes, a DockArea instance and a DashBoard instance (the one from which the extension will be
loaded and that contains all the actuators/detectors needed for your extension). The DashBoard will smoothly
initialize your class when launching it from the menu. Below you’ll find a sample of an extension module with an
extension class called MyExtension (from the pymodaq_plugins_template package)
EXTENSION_NAME = 'MY_EXTENSION_NAME'
CLASS_NAME = 'MyExtension'

class MyExtension(CustomExt):
    # list of dicts enabling the settings tree on the user interface
    params = [
        {'title': 'Main settings:', 'name': 'main_settings', 'type': 'group', 'children': [
            {'title': 'Save base path:', 'name': 'base_path', 'type': 'browsepath',
             'value': config['data_saving']['h5file']['save_path']},
            {'title': 'File name:', 'name': 'target_filename', 'type': 'str', 'value': "", 'readonly': True},
            {'title': 'Date:', 'name': 'date', 'type': 'date', 'value': QtCore.QDate.currentDate()},
            {'title': 'Do something, such as showing data:', 'name': 'do_something', 'type': 'bool', 'value': False},
            {'title': 'Something done:', 'name': 'something_done', 'type': 'led', 'value': False, 'readonly': True},
            {'title': 'Infos:', 'name': 'info', 'type': 'text', 'value': ""},
            {'title': 'push:', 'name': 'push', 'type': 'bool_push', 'value': False}
        ]},
        {'title': 'Other settings:', 'name': 'other_settings', 'type': 'group', 'children': [
            {'title': 'List of stuffs:', 'name': 'list_stuff', 'type': 'list', 'value': 'first',
             'limits': ['first', 'second', 'third'], 'tip': 'choose a stuff from the list'},
            {'title': 'List of integers:', 'name': 'list_int', 'type': 'list', 'value': 0,
             'limits': [0, 256, 512], 'tip': 'choose a stuff from this int list'},
            {'title': 'one integer:', 'name': 'an_integer', 'type': 'int', 'value': 500, },
            {'title': 'one float:', 'name': 'a_float', 'type': 'float', 'value': 2.7, },
        ]},
    ]

    def __init__(self, dockarea, dashboard):
        super().__init__(dockarea, dashboard)
        self.setup_ui()
With such a file in the extensions folder, the dashboard will be able to see it and will list it into its available
extensions. Then you’ll have to code the inners of your extension following the CustomExt class, which extends
CustomApp (see CustomApp and CustomExt). The big difference between extensions and Standalone apps resides in the fact that your
dashboard instance is available here, hence all the control modules it contains. You’ll be able to use all their
functionalities only focusing on your extension layout!
6.4.3.1. Testing an extension
The tools of pymodaq.utils.plugin_testing (see Instrument Plugins for those testing instrument plugins)
load an extension in an empty Dashboard, without hardware and without showing any window, and close everything cleanly
afterwards (the windows are deleted: left alive, they slow down all the tests run after them).
Added in version 5.3.7.
loaded_extension is a context manager giving the Dashboard and the extension instance, to write the test of the
behaviour of your extension. PluginExtensionChecks is a pytest mixin that adds, for free, one test per extension of
your package, checking that it loads and closes:
from pymodaq.utils.plugin_testing import loaded_extension, PluginExtensionChecks
from pymodaq_plugins_myplugin.extensions.my_extension import MyExtension


class TestExtensions(PluginExtensionChecks):  # package_name is found from the folder if omitted
    pass


def test_do_something():
    with loaded_extension(MyExtension) as (dashboard, extension):
        extension.settings.child('main_settings', 'do_something').setValue(True)
        assert extension.settings.child('other_settings', 'something_done').value()
The Dashboard is empty: no instrument is loaded in it. Set strict_imports = True on the mixin in the CI of your plugin, so that an extension
that cannot be imported fails instead of being skipped. The extensions of PyMoDAQ itself are tested with the same
function (packages/pymodaq/tests/extensions).
6.4.3.2. Models of the extensions
Some extensions delegate the part that depends on your experiment to a model: a small class that you write and that the extension finds in your plugin package. Four extensions use models:
Extension |
Base class of the model |
Example in pymodaq_plugins_mockexamples |
|---|---|---|
|
|
|
|
|
|
|
|
|
Sequencer, see Extending the Sequencer |
|
|
To make your models visible:
set
models = truein the[features]section of the pyproject.toml of your package (this creates thepymodaq.modelsentry point);put each model in its own module of the
modelsfolder at the root of the package (the file name is the name of the model in the extension). The class of the module that derives from the base class of the extension is the model. It can derive from an intermediate class of your own, and the base class itself or classes imported from other modules are ignored.
The package pymodaq_plugins_mockexamples gathers working examples of models together with the mock actuators and detectors to try them with: start from there rather than from a blank file, and see the page of each extension for the methods to implement.