1.2. Ubuntu
PyMoDAQ installation on Ubuntu is done in a few steps. We just need an internet connexion.
1.2.1. Python installation
We first need to download the Miniforge installer. Let’s open a terminal and run the following command (for example in the ~/Downloads directory):
Note
On Linux, ~ is an alias to indicate the home directory, i.e. /home/<username>
wget "https://github.com/conda-forge/miniforge/releases/latest/download/Miniforge3-$(uname)-$(uname -m).sh"
Once the download is finished, we should run the installer:
bash Miniforge3-$(uname)-$(uname -m).sh
Note
On Linux, the .sh files are executed using the bash command.
The “$(uname)” and “$(uname -m)” variables are here to get the filename that corresponds to our machine configuration. Run uname and `uname -m ` commands in a terminal to understand!
The installer will ask us several questions in the terminal, we will keep the default choices except for the last question, for which we should answer “yes”.
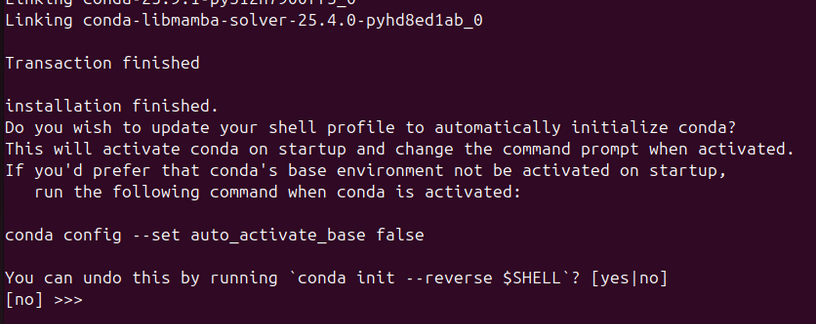
Fig. 1.10 By answering “yes”, we authorize Miniforge to modify the configuration of our terminal. It will then display in which Python environment we are into brackets at the beginning of each line.
We should then close the current terminal and reopen a new one. It should indicate that we are in the base environment into brackets.

Fig. 1.11 The default environment is called base, but we will never work into it. We will rather create a dedicated environment to properly isolate our work. That is what we will see in the following section.
Note
Miniforge will install in particular:
an environment manager: mamba. Mamba is a CLI to manage environments just like conda. However conda has restrictions in terms of licencing, hence the use of mamba as of now.
a Python interpreter (a python.exe file) in a base environment
It will also create a folder ~/miniforge3 in our home directory, where all our Python environments will be stored.
1.2.2. Set up a new Python environment
In order to have a clean installation of PyMoDAQ on our machine, we isolate it in a dedicated Python environment. Let’s execute the following command to create an environment called pmd_env with a 3.12 version of Python.
mamba create -n pmd_env python=3.12.*
Note
We can call the environment as we wish, here pmd_env (the environment is not to be mixed up with the pymodaq software that will be installed below)
As a rule of thumb, choose the second last minor version of Python to be sure that PyMoDAQ is compatible. Here 3.12 as python 3.14 is on the market!
here python=3.12.* means that the last patched version of python 3.12.x will be installed
And let’s activate it.
mamba activate pmd_env
After this command, we should notice that the name in brackets in the terminal is now pmd_env.
1.2.3. Install PyMoDAQ
After this preparation, the installation of PyMoDAQ is done with a single command line. It takes a few minutes to download and install all the dependencies in our new environment.
pip install pymodaq pyqt6
One also needs to make sure that the Qt environment can be used. Running the following command should be sufficient to start with:
sudo apt install libxkbcommon-x11-0 libxcb-icccm4 libxcb-image0 libxcb-keysyms1 libxcb-randr0 libxcb-render-util0 libxcb-xinerama0 libxcb-xfixes0 x11-utils libgl1 libegl1
It is also necessary to give some reading and writing permission access to some specific folders. In particular, PyMoDAQ creates two folders that are used to store configurations files, one assigned to the system in /etc/.pymodaq/ and one assigned to the user ~/.pymodaq/. We need to give reading/writing permission acess to the system folder. One should then run before/after installing pymodaq:
sudo mkdir /etc/.pymodaq/sudo chmod uo+rw /etc/.pymodaq
As a side note, these files are shared between different pymodaq’s versions (going from 3 to 4 for example). It is suggested to delete/remake the folder (or empty its content) when setting up a new environment with a different pymodaq version.
1.2.4. Check the installation
To check that the installation went well, we can execute a PyMoDAQ’s control module called DAQ_Move, using the command
daq_move
This prompts the following user interface. In the Actuator drop-down list, choose Mock and click Initialization. This will simulate numerically the behavior of a simple actuator, with the reading of its position.

Fig. 1.12 The DAQ_Move module.
The basic installation is now complete! :)
Note
For more details about loading PyMoDAQ modules, see Loading modules
1.2.5. Control a real instrument
In principle, PyMoDAQ can control any instrument. However, each specific hardware needs a supplementary package to be compatible with it, which we call an instrument plugin.
1.2.5.1. List of supported instruments
Numerous plugins are already available for common scientific equipment suppliers, they are referenced in the list of supported instruments.
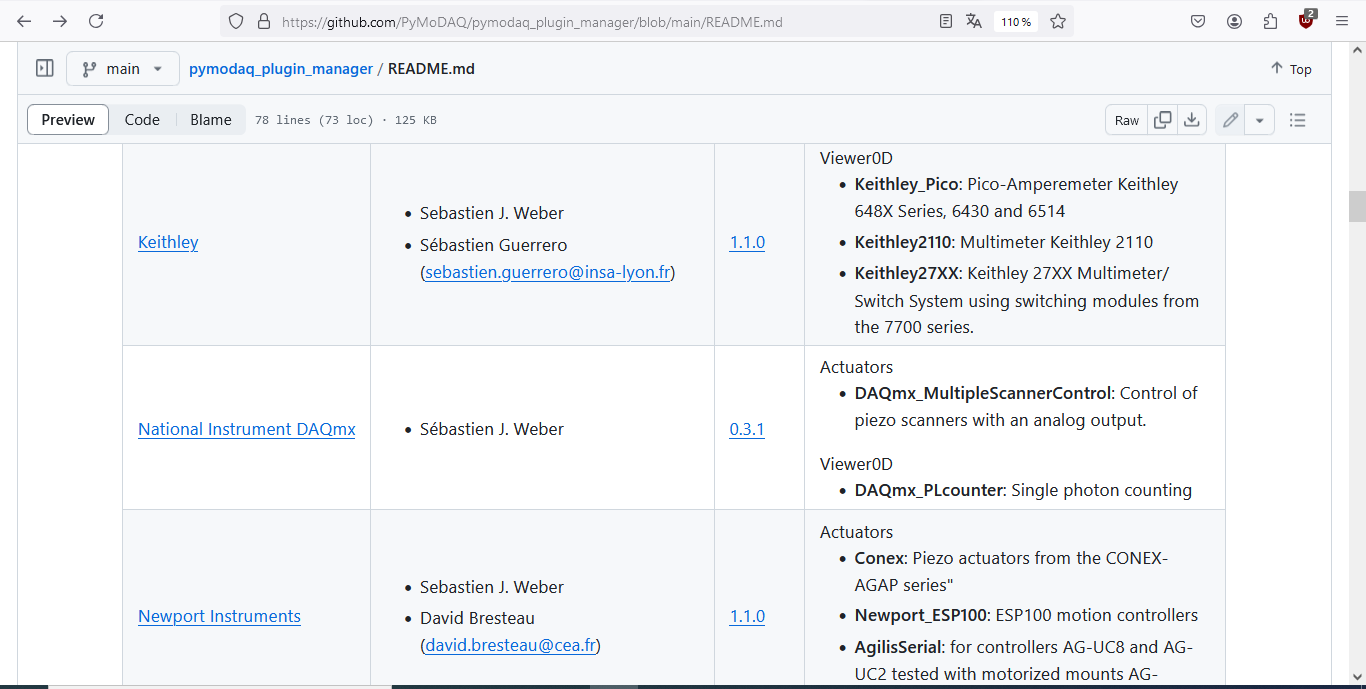
Fig. 1.13 List of supported instruments.
We can access it from the Supported instruments link on the left menu of this website.
Warning
Be careful that those plugins are mostly compatible with Windows, and not necessarily for Ubuntu.
As a general rule, if possible, we should be careful that our instrument supplier provides Linux drivers and a Python wrapper before purchasing the instrument.
1.2.5.2. Install the software of the supplier
To illustrate concretely the procedure, we suppose that we want to control a Basler camera.
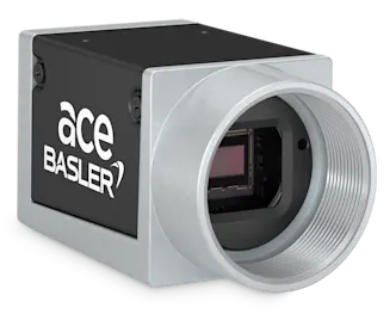
Fig. 1.14 A Basler camera.
Let’s follow the lab story Read a Basler camera for detailed instructions.
1.2.5.3. What if our instrument is not already supported?
If the instrument we want to interface is not in the list, we should firstly ask for advices from the PyMoDAQ community. The most efficient way to do so is to raise an issue on GitHub. Let’s describe our project, the instrument we want to interface… We will probably get some help there!
Secondly, we can consider to develop a plugin by our own. It is not that difficult, and a lot of documentation is available to help us step by step:
We should also have a look at external Python driver libraries, the communication with our instrument may already be implemented there:
1.2.6. Synchronize our instruments
Once all the instruments of our experimental setup are controlled with a dedicated control module, the most difficult task is behind us.
We can now group them in a Dashboard, and enjoy all the features available through the Dashboard Extensions. A group of control modules in a dashboard can be saved in a preset. A dashboard can be started with command line arguments, as explained on the dashboard page
The DAQ Scan extension is the first one to consider, as it meets the needs of any experiment that consists in scanning automatically one or several parameters and save the detector’s output.
1.2.7. Organization of the documentation
The basic use of PyMoDAQ, that do not need any coding, is documentated in the User’s Guide.
The Tutorials address specific questions about PyMoDAQ, but also about the Python ecosystem and useful tools for open-source development. As PyMoDAQ is not a library for developers but for experimental physicists and teachers, we find relevant to introduce those tools from scratch. The tutorials are of various difficulties that are indicated at the beginning of the page.
The Lab stories section is dedicated to concrete examples of use in the lab or for educational purposes.
We wish you a good experience :)