3.6.7. Extension Plugin
In a first step we have to modify the file pyproject.toml in the module’s root directory to tell PyMoDAQ that this module also contains an extension.
 [features]
 instruments = true
 extensions = true
 models = false
 ...
Next we have to get to the extension folder src/pymodaq_plugins_tutorial_extension/extensions
and rename the extension template in the extension folder, giving it a meaningful name.
.../extension$ git mv custom_extension_template.py absorption_extension.py
Now load the renamed file and adapt the names close to the top of the file according to the instructions given in the comments inside the file. Following the initial import declarations, the top of the file should afterwards look like this
...
from pymodaq_plugins_tutorial_extension.utils import Config as PluginConfig

logger = set_logger(get_module_name(__file__))

main_config = Config()
plugin_config = PluginConfig()

EXTENSION_NAME = 'Absorption'
CLASS_NAME = 'AbsorptionExtension'

class AbsorptionExtension(CustomExt):
...
The initialisation of the instance of the absorption extension can be left untouched for now.
class AbsorptionExtension(CustomExt):
...
    def __init__(self, parent: gutils.DockArea, dashboard):
        super().__init__(parent, dashboard)
        self.setup_ui()
Note that though the method setup_ui needs to be called in any custom extension, this is not done in the inherited classes’ initialisation. The aim is to permit setting up some matter which is needed to initialise its UI but needs in turn the parent class already to be initialised.
The main GUI area of the application is accessible through the instance variable self.dockarea. Any widgets can be added there via instances of Dock. The following code creates the display for the current measurement. It should be pretty self explaining.
from pymodaq_gui import utils as gutils
from pymodaq_gui.plotting.data_viewers.viewer1D import Viewer1D
...
class AbsorptionExtension(CustomExt):
...
    def setup_docks_and_widgets(self):
        self.create_dashboard_toolbar()

        self.spectrum_label = gutils.dock.DockLabel("Raw Data")
        spectrum_dock = gutils.Dock('Data', label=self.spectrum_label)
        self.docks['spectrum'] = self.dockarea.addDock(spectrum_dock)
        spectrum_widget = QtWidgets.QWidget()
        self.spectrum_viewer = Viewer1D(spectrum_widget)
        self.spectrum_viewer.toolbar.hide()
        spectrum_dock.addWidget(spectrum_widget)
To be able to test the newly constructed GUI, two methods populated later have to be temporarily disabled.
 class AbsorptionExtension(CustomExt):
 ...
     def setup_actions(self):
         return
         """Method where to create actions to be sub-classed. Mandatory"""
 ...
     def connect_things(self):
         return
         """Connect actions and/or other widgets signal to methods"""
To make PyMoDAQ aware of the newly created extension we have to re-install the package in editable mode which has to be done in the root directory of the package:
$ cd /path/to/extension-plugin-code/pymodaq_plugins_tutorial_extension
$ pip install -e .
The dashboard may now be launched. The command line switch -x tells PyMoDAQ to directly load the indicated experiment configuration.
$ dashboard -x absorption -e Absorption
The list of extensions should contain an entry “Absorption”. After starting it, a window should pop up which looks like the following
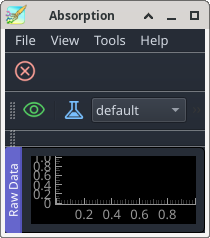
However, it hasn’t got any functionality yet. In case that our newly created extension doesn’t show up in the list, most likely some typo or messed-up indentation prevents the module from being loaded. To check that, you may run the extension code directly:
$ cd src/pymodaq_plugins_tutorial_extension/extensions
$ python absorption_extension.py
If Python throws any error at you, that message should tell where the problem is. In case of success, the bare extension window should pop up. Another source of information can be the log file which you may scan for error messages. Did you catch the error in the main() function at the end of the extension file?
-> branch bare-extension
To get things working in a preliminary and primitive fashion we add a method that accepts data from the spectrograph’s 1D viewer plugin. It simply extracts the raw spectrometer data from the received DataToExport object and displays that in the viewer.
from pymodaq.utils.data import DataToExport
...
class AbsorptionExtension(CustomExt):
...
    def take_data(self, data: DataToExport):
        spectro_data = data.get_data_from_dim('Data1D')[0]
        self.spectrum_viewer.show_data(spectro_data)
Note that this assumes that the data received from the plugin contains a set of one dimensional data and that the first (or only) one dimensional array therein contains the intensity data from the spectrometer. This is where we may hit the limits for creating a generic application. A plugin written by someone else and delivering its data in a different form may not be working here. DataToExport comes with quite a list of methods which permit to extract contained data identified by names and labels. Having a general spectrometer extension in mind, one may want to retrieve first a data set, analyse its content and give the user the choice what data item should be taken. However, that will be covered in a later chaper. For the time being, we know what’s in the data item and can just go on.
Once the dashboard has been loaded with the experiment, the devices defined in the experiment can be registered with the modules manager. This allows to obtain a reference to the detector which can be connected to the data display. The mechanism behind the scene is that once the method self.detector.grab() is called, PyMoDAQ quests acquisition on the device in a loop. For each retrieved data item the plugin emits the signal grab_done_signal which we have to connect to the extension’s method take_data.
 from pymodaq.utils.data import DataToExport, Axis
 from pymodaq.utils.managers.modules.utils import ModuleType
 ...
 class AbsorptionExtension(CustomExt):
 ...
     def do_things_after_experiment_set(self, experiment_name: str):
         self.modules_manager.detectors_all = \
             self.dashboard.modules_manager.detectors_all

         self.detector = \
             self.modules_manager.get_mod_from_name('Spectrometer',
                                                    ModuleType.Detector)
         self.detector.grab_done_signal.connect(self.take_data)
         self.x_axis = \
             Axis(label='Wavelength', units='nm',
                  data=self.detector.controller.wavelengths, index=0)
Note that there’s an issue here how to identify the device of choice. ModulesManager.get_mod_from_name needs to get the name exactly as we have defined it in the experiment. However, how should a non-developing user know what to enter there, unless having been specifically instructed? We’ll cover that later with an appropriated configuration dialog. For now, we’ll have to pay attention that the two names match exactly.
Two methods take care of starting and ending the acquisition.
class AbsorptionExtension(CustomExt):
...
    def start_acquiring(self):
        self.detector.grab()

    def stop_acquiring(self):
        self.detector.stop_grab()
To make them accessible from the GUI, two methods predefined in the template which we had deactivated before have to be populated.
 def setup_actions(self):
     self.add_action('acquire', 'Acquire', 'run2',
                     "Acquire", checkable=False, toolbar=self.toolbar)
     self.add_action('stop', 'Stop', 'stop2',
                     "Stop", checkable=False, toolbar=self.toolbar)

 def connect_things(self):
     self.connect_action('acquire', self.start_acquiring)
     self.connect_action('stop', self.stop_acquiring)
The extension has now a second tool bar from which the acquisition can be started and stopped.
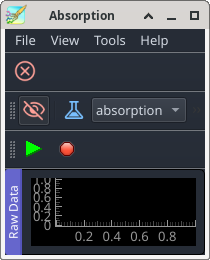
When you start the acquisition, the extension does nothing more than what is already happening in the panel named “Spectrometer MockSpectro” in the dashboard.
Stopping acquisition before it has been started doesn’t make much sense. PyMoDAQ still handles the situation correctly. However, necessary actions unknown to PyMoDAQ may not do so. It is therefore better to activate only those actions which actually make sense.
 def setup_actions(self):
     ...
     self._actions["stop"].setEnabled(False)

 def start_acquiring(self):
     self._actions["acquire"].setEnabled(False)
     self._actions["stop"].setEnabled(True)
     self.detector.grab()

 def stop_acquiring(self):
     self.detector.stop_grab()
     self._actions["acquire"].setEnabled(True)
     self._actions["stop"].setEnabled(False)
Note that this introduces a bug. The dashboard is of course not aware of the functionality created in the extension. When starting or stopping the acquisition from the dashboard, the tool bar buttons in the extension are not updated. Again, this will be addressed later on.
-> branch extension-with-data
You may have noticed while playing around with the extension that it opens up with a size which is not very suitable. And changes to the window are not preserved over quitting the dashboard. Let’s make changes so that the GUI geometry stays permanently. Two functions, inverse of each other, take care of writing the current parameter values and geometry settings to a configuration file and reading them back. This is done here in a preliminary fashion using Qt’s settings mechanism. @PyMoDAQxperts: please replace this with more PyMoDAQonian style …
def write_settings(self, qt_settings):
     qt_settings.setValue("geometry", self.mainwindow.saveGeometry())
     qt_settings.setValue("dockarea", self.dockarea.saveState())

def read_settings(self, qt_settings):
     geometry = self.qt_settings.value("geometry", QByteArray())
     self.mainwindow.restoreGeometry(geometry)
     state = self.qt_settings.value("dockarea", None)
     if state is not None:
         try:
             self.dockarea.restoreState(state)
         except: # pyqtgraph's state restoring is not very fail safe
             # erase inconsistent settings in case pyqtgraph trips
             self.qt_settings.setValue("dockarea", None)
To make this work, the two functions have to be hooked up into the initialisation and shut down procedures.
 from qtpy.QtCore import QSettings, QByteArray
 ...
 from pymodaq_utils.config import Config, ConfigError, get_set_config_dir
 ...
 def __init__(self, parent: gutils.DockArea, dashboard):
     ...
     self.setup_ui()
     config_dir = get_set_config_dir("gui-state", user=True)
     settings_file_name = f'{config_dir}/{EXTENSION_NAME}.conf'
     self.qt_settings = QSettings(settings_file_name, QSettings.NativeFormat)
     self.read_settings(self.qt_settings)

 def quit_fun(self):
     self.write_settings(self.qt_settings)
The first of the newly introduced lines in the init method returns a path to a sub folder gui-state located in the user’s PyMoDAQ configuration folder. If that sub folder doesn’t exist yet it is created. GUI settings can go in there now. Have a try, resizing the extension window should now persist over shutting down and restarting the extension and the dashboard. Note that this geometry sub-section may not be necessary in future versions of PyMoDAQ.
-> branch geometry
The parameters controlling the spectrometer are all accessible in the experiment configuration and could be changed via the detector’s widget in the dashboard, or using the configurator (try this out yourself as an exercise). However, to ease operation, a set of most important parameters shall be displayed in the main window of the spectrometer application. They are declared in the preamble of the extension class in the same fashion as device parameters in the preamble of a plugin class. All parameters defined in params[] are made available in self.settings_tree by PyMoDAQ’s start-up machinery.
 class AbsorptionExtension(CustomExt):
     ...
     params = [
         {'name': 'device_params', 'title': 'Device parameters', 'type': 'group',
          'children': [
              {'name': 'integration_time', 'title': 'Integration Time [ms]',
               'type': 'float', 'min': 0.001, 'max': 10000, 'value': 50,
               'tip': 'Integration time in seconds'},
              {'name': 'averaging', 'title': 'Averaging',
               'type': 'int', 'min': 1, 'max': 1000, 'value': 10,
               'tip': 'Software Averaging'},
            ]
          },
        ]
     ...
     def setup_docks(self):
         self.docks['settings'] = Dock('Application Settings')
         self.dockarea.addDock(self.docks['settings'])
         self.docks['settings'].addWidget(self.settings_tree)

         self.spectrum_label = DockLabel("Raw Data")
         spectrum_dock = Dock('Data', label=self.spectrum_label)
         self.docks['spectrum'] = \
             self.dockarea.addDock(spectrum_dock, "right",
                                   self.docks['settings'])
         ...
The newly introduced dock holds a parameter tree containing what has been defined in params. Note the change in placing the data viewer at the right of the parameter dock. To make the detector aware of parameter changes, another predefined method has to be populated
 class AbsorptionExtension(CustomExt):
 ...
     def value_changed(self, param):
         if param.name() == "integration_time":
             self.detector.settings.child('detector_settings',
                                          'integration_time') \
                                   .setValue(param.value())
To prevent the contents of an obsolete configuration file messing up the layout, remove the file in question
$ rm ~/.pymodaq/gui-state/Absorption.conf
The Absorption extension should now look like
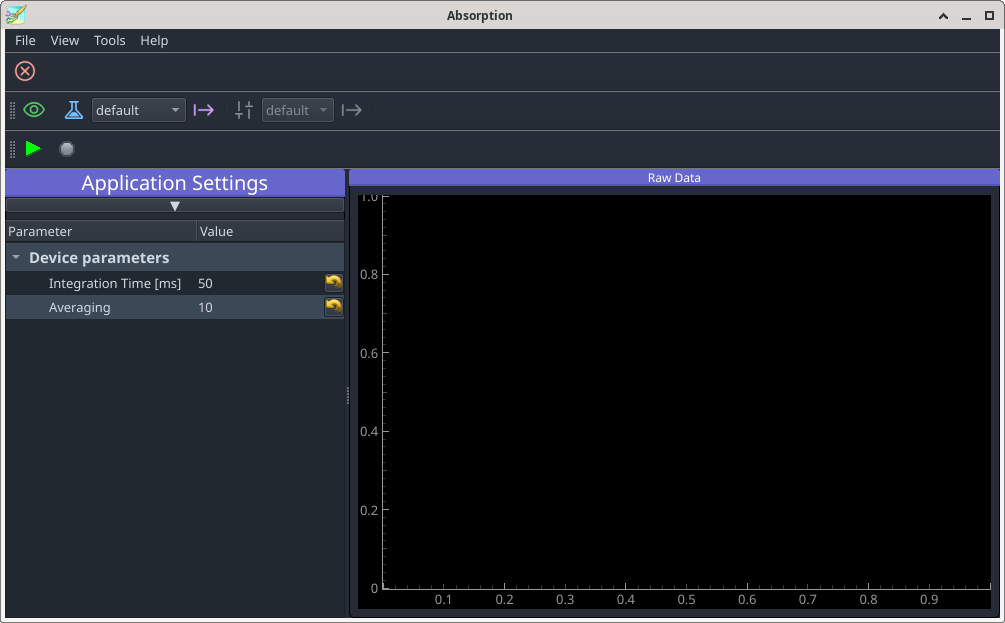
The parameter Average has not yet any effect. Let’s change that.
 import numpy as np
 ...
 from pymodaq.utils.data import DataFromPlugins, DataToExport, Axis
 ...
 class AbsorptionExtension(CustomExt):
     ...
     def start_acquiring(self):
         self.n_samples = 0
         self.n_average = self.settings.child('device_params')['averaging']
         ...
     def take_data(self, data: DataToExport):
         spectro_data = data.get_data_from_dim('Data1D')[0]
         self.n_samples = self.accumulate_data(spectro_data[0], self.n_samples)
         if self.n_samples < self.n_average:
             return

         if self.n_average < 2:
             self.spectrum_viewer.show_data(spectro_data)
             return

         self.mean_current, self.error_current = \
             self.average_data(self.sum_data, self.squares_data, self.n_samples)
         self.n_samples = 0
         dfp = DataFromPlugins(name='current',
                               data=[self.mean_current, self.error_current],
                               dim='Data1D', labels=['current', 'error'],
                               axes=[self.x_axis])
         self.spectrum_viewer.show_data(dfp)
     ...
     def accumulate_data(self, data, n_samples):
         if n_samples:
             self.sum_data += data
             self.squares_data += data**2
         else:
             self.sum_data = data
             self.squares_data = data**2
         return n_samples + 1

     def average_data(self, sum_data, squares_data, n_samples):
         mean = sum_data / n_samples
         error = np.sqrt((n_samples * squares_data - sum_data**2)
                         / (n_samples**2 * (n_samples - 1)))
         return mean, error
Zooming in on the error curve permits to see how the error scales now with  .
-> branch averaging
Once again, changes on the parameters do not survive quitting. One could write them to and recover them from a configuration file one by one. However, expecting the number of parameters to increase with time, it will be advantageous to prepare for that now. Since the device parameters are a dict inside a dict inside an array, it is easier to declare them in a separate list
 class AbsorptionExtension(CustomExt):

     device_params = [
         {'name': 'integration_time', 'title': 'Integration Time [ms]',
          'type': 'float', 'min': 0.001, 'max': 10000, 'value': 50,
          'tip': 'Integration time in seconds'},
         {'name': 'averaging', 'title': 'Averaging',
          'type': 'int', 'min': 1, 'max': 1000, 'value': 10,
          'tip': 'Software Averaging'},
         ]

     params = [
         {'name': 'device_params', 'title': 'Device parameters', 'type': 'group',
          'children': device_params },
         ]

 ...

     def write_settings(self, qt_settings):
         ...
         for param in self.device_params:
             qt_settings.setValue(param['name'],
                                  self.settings.child('device_params') \
                                  [param['name']])

     def read_settings(self, qt_settings):
         ...
         for param in self.device_params:
             self.settings.child('device_params')[param['name']] = \
                 qt_settings.value(param['name'], param['value'])
The second argument of QSettings.value is a default value which prevents a None value being inserted when the entry asked for is not present in the configuration file, which would cause an exception to be raised.
Until now, the extension still does nothing more than a bare plugin can do. Features beyond will be introduced in the next chapter.
-> branch params-to-settings