5.3. How to create a new plugin/package for PyMoDAQ?
Author email |
|
Last update |
january 2024 |
Difficulty |
Intermediate |
In this tutorial, we will learn how to create a brand new plugin either for adding instruments, models or extensions!
5.3.1. Prerequisite
We will suppose that you have followed these tutorials:
In the latter, we presented how to interact with existing repositories but what if:
you have an instrument from a manufacturer that doesn’t have yet its package!
you want to build a brand new extension to the DashBoard!
No worries, you don’t have to start from scratch, but from a fairly complete template package!
5.3.2. The PyMoDAQ’s plugin template repository
Among all the PyMoDAQ related github repository, there is one that is not a real one. This is the pymodaq_plugins_template (see Fig. 5.3)
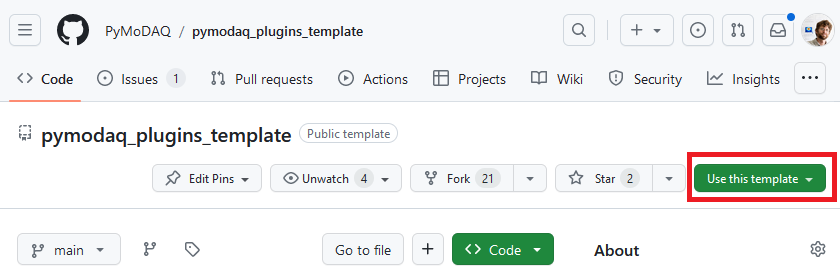
Fig. 5.3 The Template repository to create new plugin packages!
You see that on this repository home page, a new green button Use this template appeared (red box on figure). By clicking on it, you’ll be prompted to create a new repository. In the next page, you’ll be prompted to enter a owner and a name for the repo, see Fig. 5.4:
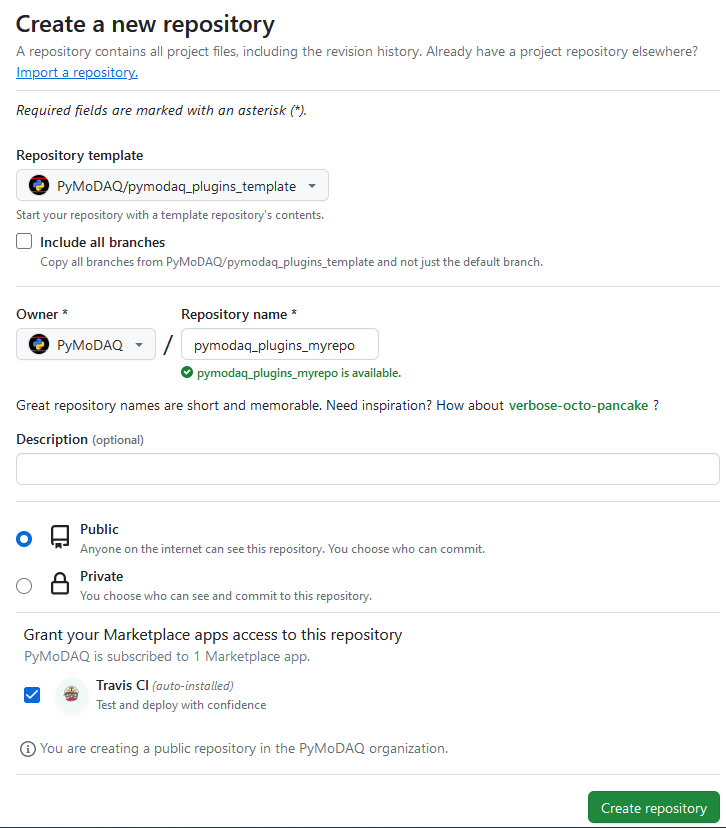
Fig. 5.4 The creation page of the new plugin repository
In there, you can choose as a owner either yourself or the PyMoDAQ organisation if you’re already part of it. If not but you are willing, just send an email to the mailing list asking for it and you’ll be added and set as the manager of your future new plugin package. The name of the plugin as to follow the rule: pymodaq_plugins_<my_repo_name> where you have to replace <my_repo_name> by the name of the manufacturer if you’re planning to add instruments or a clear name for your application/extension… Make it Public because we want to share our work within the PyMoDAQ community!
That’s it, your new github repo compatible with PyMoDAQ is created. You now have to properly configure it!
5.3.3. Configuring a new plugin repository
For a correct configuration (for your plugin be installable and recognised by PyMoDAQ), you’ll have to modify a few files and folders. Fig. 5.5 highlight the package initial structure. You’ll have to:
rename with the new package name the two directories in highlighted red
fill in the appropriate information in plugin_info.toml and README.rst files, highlighted in green
rename the python instrument file, highlighted in purple with the dedicated instrument name (see Story of an instrument plugin development for details on instrument, python file and class name convention).
add appropriate default settings in the config_template.toml file (do not rename it) in the resources folder,
remove the unused instrument example files of the template repository in the daq_move_plugins and daq_viewer_plugins subfolders.
Modify and configure the automatic publication of your package on the Pypi server (see Publishing on Pypi)
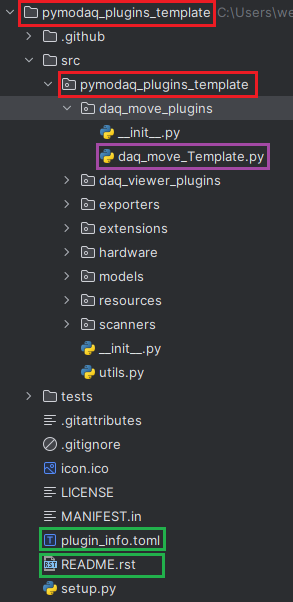
Fig. 5.5 The template package initial structure
5.3.4. Publishing on Pypi
In the Python ecosystem, we often install packages using the pip application. But what happens when we execute pip install mypackage? Well pip is actually looking on a web server for the existence of such a package, then download it and install it. This server is the Pypi Python Package Index
Developers who wish to share their package with others can therefore upload their package there as it is so easy to install it using pip. To do that you will need to create an account on Pypi:
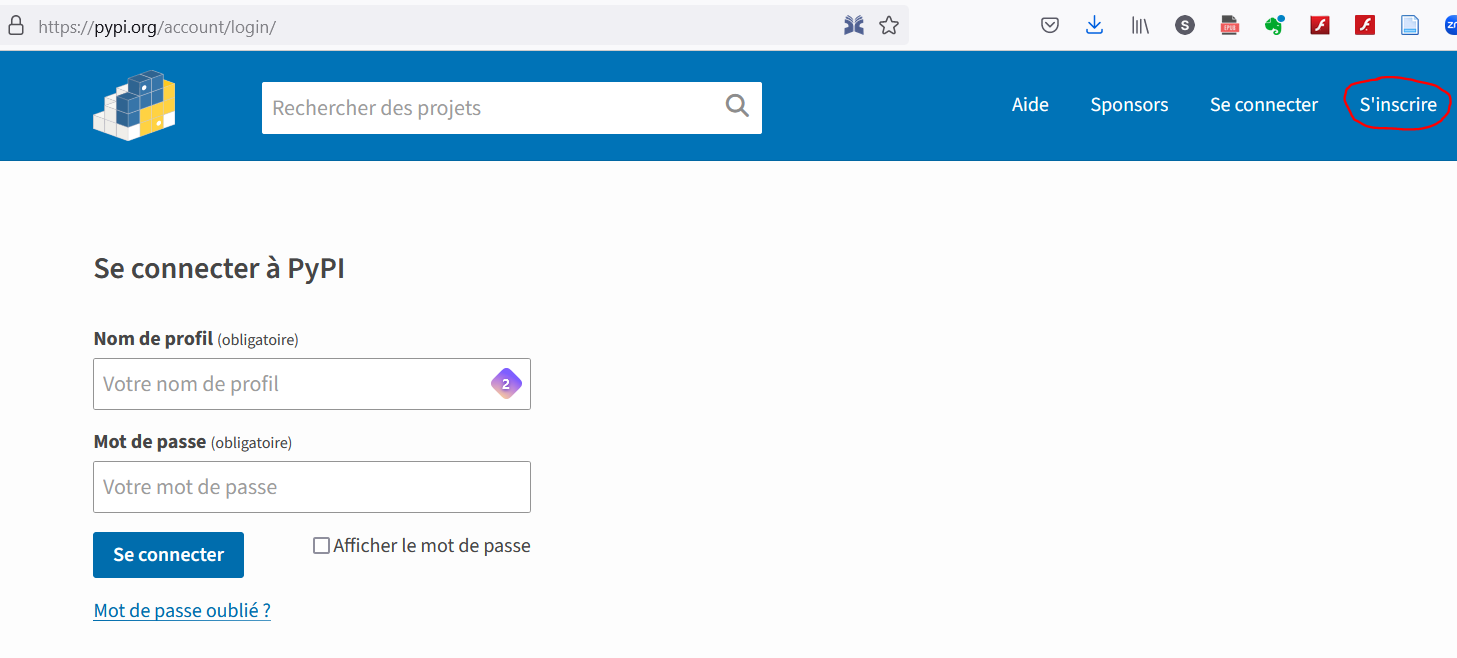
Fig. 5.6 Creation of an account on Pypi
Note
Until recently (late 2023) only a user name and password were needed to create the account and upload packages. Now the account creation requires double identification (can use an authentication app on your mobile or a token). The configuration of the Github action for automatic publication requires also modifications… See below.
You have to configure an API token with your pypi account. This token will allow you to create new package on your account, see API Token for more in depth explanation. This pypi package initial creation and later on subsequent versions upload may be directly triggered from Github using one of the configured Actions. An action will trigger some process execution on a distant server using the most recent code on your repository. The actions can be triggered on certain events. For instance, everytime a commit is made, an action is triggered that will run the tests suite and let developers know of possible issues. Another action is triggered when a release is created on github. This action will build the new version of the package (the released one) and upload the new version of the code on pypi. However your github account (at least the one that is the owner of the repository) should configure what Github call Secrets. Originally they were the pypi user name and password. Now they should be the __token__ string as username and the API token generated on your pypi account as the password. The yaml file corresponding to this action is called python-publish.yml stored in the .github folder at the root of your package. The content looks like this:
name: Upload Python Package

on:
   release:
     types: [created]

jobs:
  deploy:

    runs-on: ubuntu-latest

    steps:
    - uses: actions/checkout@v2
    - name: Set up Python
      uses: actions/setup-python@v2
      with:
        python-version: '3.11'
    - name: Install dependencies
      run: |
        python -m pip install --upgrade pip
        pip install setuptools wheel twine toml "pymodaq>=4.1.0" pyqt5

    - name: create local pymodaq folder and setting permissions
      run: |
        sudo mkdir /etc/.pymodaq
        sudo chmod uo+rw /etc/.pymodaq

    - name: Build and publish
      env:
        TWINE_USERNAME: ${{ secrets.PYPI_USERNAME }}
        TWINE_PASSWORD: ${{ secrets.PYPI_PASSWORD }}
      run: |
        python setup.py sdist bdist_wheel
        twine upload dist/*
were different jobs, steps and actions (run) are defined, like:
execute all this on a ubuntu virtual machine (could be windows, macOS…)
Set up Python: configure the virtual machine to use python 3.11
Install dependencies: all the python packages necessary to build our package
create local pymodaq folder and setting permissions: make sure pymodaq can work
Build and publish: the actual thing we are interested in, building the application from the setup.py file and uploading it on pypi using the twine application
For this last step, some environment variable have been created from github secrets. Those are the __token__ string and the API token. We therefore have to create those secrets on github. For this, you’ll go in the settings tab (see Fig. 5.7) to create secrets either on the organization level or repository level (see PyMoDAQ example on the organisation level, Fig. 5.8).

Fig. 5.7 Settings button on github
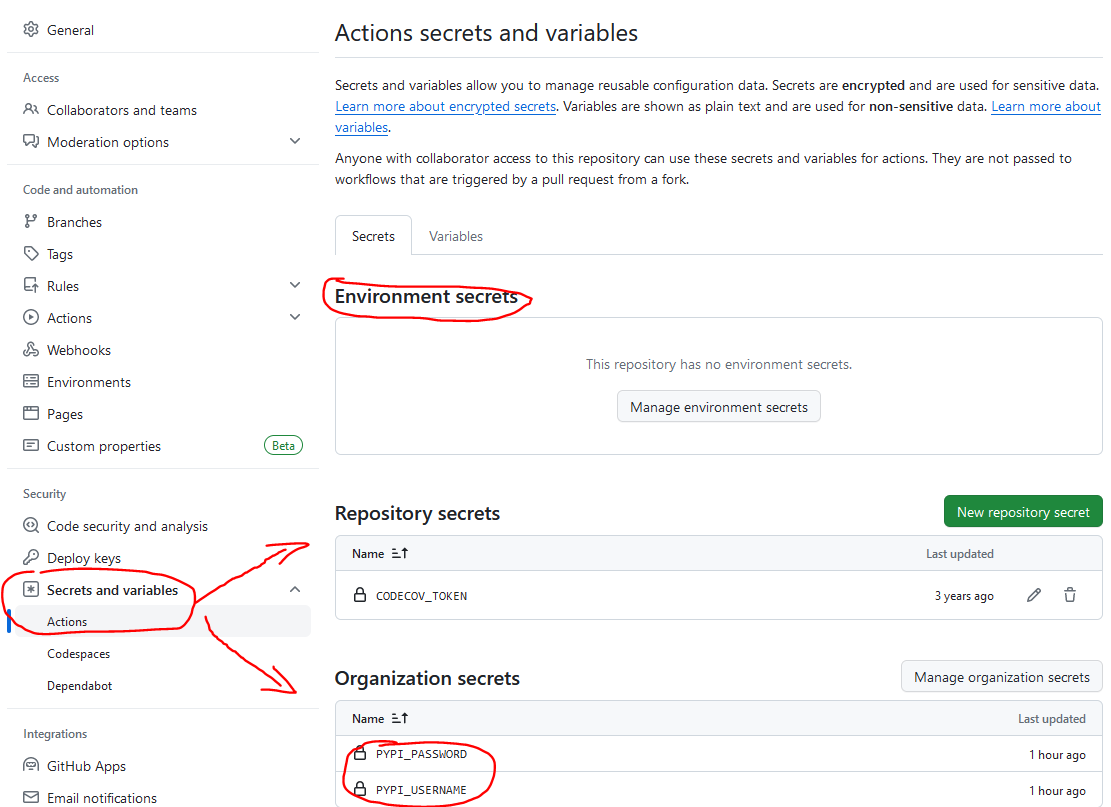
Fig. 5.8 Secrets creation on Github
That’s it you should have a fully configured PyMoDAQ’s plugin package!! You now just need to code your actual instrument or extension, for this look at Story of an instrument plugin development
Note
Starting with PyMoDAQ version 4.1.0 onwards, old github actions for publication and suite testing should be updated in the plugin packages. So if you are a package maintainer, please do so using the files from the template repository.